Planting and caring for shallots in open ground. Shallots - family onions in your garden Family long shallots growing
Shallots on greens
SHALLOT. ONION BRANCH
Shallots are better known to gardeners as family onions, and in other countries they are even called potato onions, because they are propagated like potatoes, leaving part of the harvest for planting next year.
ACCORDING TO MODERN classification, shallots are within the species Onion (Allium sera) and differ from onions only in their bulbs. Type of onion according to biological characteristics and economic use divided into three groups: regular onions, branching shallots and viviparous multi-tiered onions, forming bulbs in inflorescences.
Thus, shallots are an ordinary onion that reproduces mainly by dividing the bulbs. Shallots differ from vegetatively propagated varieties of onions, which are widely cultivated in the north of Russia, by a difficult transition to flowering. Of course, you can “force” shallots to shoot, bloom and produce seeds, but this is usually done only by specialists.
Long-term vegetative propagation of shallots leads to a decrease in yield and resistance to disease. To restore the viability of the variety, they resort to seed propagation. Then the most productive, healthy, typical plants for the variety are selected from the seed progeny, which are used as initial planting material, and then the variety is again bred vegetatively.
The Eastern Mediterranean is considered to be the birthplace of shallots, from where they were brought to Central Europe by the crusaders returning home. Shallots, along with garlic and onions, were widespread in the Middle Ages. In the famous garden of Charlemagne, who reigned from 768 to 814, shallots were grown among other crops.
Currently, shallots are popular mainly among amateurs. It is less productive compared to onions, but has a more delicate and pleasant taste. The bulbs are small, no more than 3-4 cm in diameter, very dense, with strong dry scales, from white and light yellow to purple in color and with a thin neck. The succulent inner scales are usually white and thin. The bulbs have a slightly irregular shape, with a point at the base (the place of attachment to the bottom of the mother bulb).
Shallots are rich in vitamins, contain a lot of dry matter, in particular sugars, and therefore have more calories, and most importantly, they are stored very well, right up to the new harvest and even beyond.
Shallot varieties differ from each other in early ripening, degree of branching (number of bulbs in the nest), number of leaves and color of dry scales. Most varieties are earlier ripening than onions, and ripen within 60-75 days after the leaves grow. There are usually 5-7 bulbs in a nest, and in local varieties of folk selection there are up to 20-30 bulbs. Breeding work with shallots is carried out at the All-Russian Research Institute of Selection and Seed Production of Vegetable Crops, the Siberian Research Institute of Plant Growing, and at the West Siberian Experimental Station of the All-Russian Scientific Research Institute. In the State Register of Breeding Achievements of the Russian Federation for 2001, there are seven varieties of shallots.
The manifestation of economically valuable characteristics of a variety in shallots depends on the quality of planting material. If small bulbs (2 cm in diameter or less) are used for planting, then the plants branch less, but the daughter bulbs are smaller and mature later. And large mother bulbs often produce many small bulbs in the nest.
Storage conditions for planting material also affect quality. If it has been stored at temperatures above 18°C (warm storage), the shallots will regrow and ripen later, but will produce more shoots and leaves and usually larger bulbs compared to plants from bulbs stored at 0-5°C (cold storage). way). The tendency for plants to bolt is also more pronounced during cold storage.
Shallots on turnips
Planting density is 25-30 medium-sized bulbs per 1 m2. It is best to use bulbs with a diameter of about 3 cm and a weight of about 30 g for planting.
The soil for planting onions is prepared in the fall - they dig up to 20-25 cm and add humus at the rate of 4-6 kg per 1 m2. In Central Russia, onions are best grown in beds, which are also best prepared in the fall. In spring, the soil is only loosened shallowly and full mineral fertilizer is applied.
In spring, shallots are planted as early as possible. The bulbs are planted in rows with row spacing of 20-30 cm and a distance in the row of 10-15 cm, to a depth of 10-12 cm. The surface of the ridges is mulched with peat.
Care consists of loosening the soil, controlling weeds, watering in dry times, but only in the first half of the growing season, and 1-2 fertilizing. The first fertilizing with nitrogen fertilizers is after massive leaf regrowth. The second - phosphorus-potassium fertilizers (without nitrogen) - at the beginning of the formation of bulbs. On fertile soils filled with organic fertilizers, you can do without fertilizing.
Of the pests for shallots, the onion fly (from the beginning of May) and the onion moth (from the end of May) are especially dangerous; the most harmful diseases are downy mildew (in wet weather) and neck rot.
Bulbs are dug up when the leaves turn yellow in the last ten days of July. They are dried in the sun, just like onions.
Shallots on greens
Shallots are often used for growing green onions during winter and early spring planting. Pre-winter sowing is practiced mainly in the south, since in central Russia, shallots overwinter only 40-70%, depending on weather conditions. Green onions from winter planting are ready for harvesting 7-10 days earlier, and the mass of leaves per plant is higher. Small bulbs usually overwinter better, but the yield of greens from them is lower than from medium-sized bulbs. Leaves are cut 35-45 days after planting, at a height of about 25 cm.
Shallots are perfectly grown for greenery in winter and spring, since multi-primed bulbs produce a high yield of green feathers with a relatively low consumption of planting material. Before January, shallots are not removed because they have a deeper dormant period compared to onions. The duration of forcing varies from 25 to 35 days, depending on the planting date, temperature and light. Productivity naturally increases from early to late planting dates.
Storage
Onions intended for winter storage are dried in a well-ventilated cool room, for example in an attic. Dry bulbs are cleaned of loose husks and roots, damaged, diseased and “thick necks” are discarded. Before storage, it is useful to warm the seed material at a temperature of 30-40°C for 5-7 days.
Store onions in nets or slatted boxes in a layer of 3-4 cm at a temperature of 18-22°C (warm method) or at a temperature of 0-5°C (cold method). During warm storage, more intense evaporation of moisture occurs and more plastic substances are consumed for respiration. During storage, onions are sorted and rotten and sprouted bulbs are discarded. Interestingly, the bulbs can divide during storage, but this depends on the characteristics of the variety.
V. KOKOREVA
Published on the website of the Publishing House “Arguments and Facts” (http://www.aif.ru)
AiF At the dacha, issue 21 (112) November 7, 2001
Article address: http://www.aif.ru/online/dacha/112/03_01?print
The fragrant onion is the best decoration for the summer table, as well as the most important ingredient in many culinary masterpieces and ordinary dishes. Shallots are one of the varieties of crops traditionally grown in the gardens of domestic gardeners, which do not require a large investment of time and effort in caring for themselves. Many gardeners choose “Delicacy” shallots for planting. We will describe the description of the variety, growing from seeds and much more in this article.
Shallot “Delicacy”: growing from seeds
Despite the fact that the main topic of our article is a specific varietal variety of shallots - “Delicacy”, we will still consider this culture in general, and at the same time we will describe other varieties, since the differences between one type and another will be insignificant.
So, the shallot is a typical representative of the garden of every Russian farmer, outwardly very similar to the most common onion, however, it has one significant difference: its onion head consists of several lobes, similar to cloves of garlic.

Here are the main advantages of this onion variety, for which it is used with great pleasure:
- almost all varieties of this onion belong to the category of early ripening;
- storage of shallots is long-term, it can lie all year until a new harvest is obtained;
- in early spring it produces abundant greens, very juicy and great for salad;
- it is easy to clean;
- The bulbs, as a rule, grow evenly, do not succumb to mold and lie well.
It must be said that, unlike traditional onions, shallots have pronounced medicinal properties, since they contain a much higher concentration of:
- vitamin C;
- various essential oils;
- minerals;
- vitamins of other groups.
Thus, shallots work as an excellent detox remedy, and also actively strengthen the immune system, work on problems of the gastrointestinal tract, etc.

The shallot has an edible and very juicy green part, and its “turnip” is also used for food.
As for the taste characteristics of the culture, you need to keep in mind that they are also at the same level. In cooking, this type of onion is very popular due to the fact that it tastes good in any dish:
- salad;
- to meat;
- to fish;
- into the sauce;
- for garnish;
- in marinade, etc.
Regarding storage, this vegetable is as unpretentious as it is in cultivation. The storage requirements are as follows:
- put in boxes;
- place in a dry and slightly cool place;
- Do not store next to other vegetables.

How to grow shallots in your garden
Another feature of shallots is that this crop rarely produces arrows topped with seed pods, so it is hardly possible to independently collect planting material for sowing next year.
However, in specialized stores you can buy:
- like the seeds themselves;
- and the sowing of the culture we are interested in.
The purchased seed will grow in your garden no worse, however, if you still want to collect the seeds yourself, then try to bring the plant to bolting. You can do this as follows.
- To begin with, select the largest, smoothest and generally healthy and beautiful bulbs from last year’s harvest, the condition of which is at its best.
- The selected bulbs must then be stored for 3 months in a room where the temperature will be between +5°C and +11°C.
- At the end of April, plant the onions prepared according to all the rules into the ground.

To get shallot seeds yourself, you need to force it to “go into the arrow”, that is, to form a box with seeds
The steps listed above are called “vernalization” and are aimed at stimulating the bolting process in shallots. Bulbs planted and previously prepared in this way quickly produce an arrow, at the end of which an inflorescence first forms, which then turns into a box with seeds.
Preparing the land for planting shallots
Each culture, as is known, has some cultivation characteristics. Onions in general, and shallots specifically, were no exception. The conditions for growing the plant will vary somewhat depending on why you are growing it:
- to obtain juicy greens;
- for the sake of turnips for the winter.
In any case, in order for you to be able to get an abundant amount of vegetables at the end of the growing season, it is very important to competently approach the following issues:
- choose a suitable landing site;
- Pre-prepare the soil at your disposal.

So, let’s first decide on which soil is the most pleasant for shallots to grow. This plant will be most fertile if it grows on the ground:
- non-acidic;
- loose;
- filled with nutrients.
If the soil in your garden is acidic, and you do not neutralize this acid, you will have to face such negative effects as:
- yellowing of onion tops;
- drying out the onion parts.
In other words, acidic soil equals crop loss.
In addition, if you live in swampy areas where groundwater rivers are too close to the surface of the earth, then it is advisable to drain the soil before planting this plant.

As for the localization parameters of shallots on the site, you need to choose places that:
- are located on flat areas;
- perfectly illuminated by the sun;
- Do not place them near trees, which can deprive the onions of some of the natural light.
Before planting onions in garden soil, you need to thoroughly fertilize the soil:
- organic fertilizers;
- mineral supplements.
In addition, it is important to follow the rules of crop rotation, which mean that shallots must be planted in place of friendly crops that were previously growing here. Thus, the category of “friends” of the culture we are considering includes:
- potato;
- tomatoes;
- zucchini;
- pumpkin;
- beans;
- cucumbers

But these are the plants you should be careful of:
- carrots;
- garlic;
- shallots directly;
- sunflowers;
- corn.
However, it is desirable that not only the desired crops be swapped with the shallots, but also that the neighboring plants are suitable for growing together. So, an unfriendly carrot, for example, is an excellent neighbor for the onion variety in question, because:
- the airy substances emitted by it drive away onion flies;
- The volatile substances emitted by shallots prevent carrot flies from reaching the carrots.
In addition, the following can have a similar protective effect for our plant:
- radish;
- strawberry;
- leaf salad;
- cucumbers

Planting shallots on a feather
As we mentioned above, shallots can be grown directly either for green feathers or to produce turnips. In order to get the green part and enjoy it for a long period in the summer, it is necessary to plant shallots according to actions carried out in a certain sequence.
Table 1. How to properly plant shallots to obtain green feathers
| Nuance | Description |
|---|---|
| Where to plant shallots for greenery | If your goal is not to obtain a quick harvest of onion turnips, then you can grow shallots for greens literally anywhere: |
| Timing for planting seed | The timing of planting the crop we are interested in on greenery will vary depending on how and where you plant it. So: |
| When is the harvest taking place? | The first feathers of greenery can be collected within a month after you plant the plant in the ground, no matter in an apartment or in a garden. Once the greens reach a height of about 25 centimeters, they can be cut off and the onion reused. To do this you need it: |

As you can see, getting some green shallots for your food is very easy, you just need to put in a little effort. However, if you still want to harvest onions in bags for the winter, then you need to act differently.
Spring planting of shallots
Planting the crop we are considering in the spring can be done to obtain:
- green onion tops;
- onion part of the plant.
At the same time, preparation of the site for planting is carried out directly in the fall, in several stages. Let's look at them.
Table 2. How to prepare the land for planting shallots
| Nuance | Description |
|---|---|
| Weed removal | First, the area must be cleared of weeds by digging up the land area and at the same time removing: |
| Digging | If you did not dig up the soil thoroughly enough during the procedure for clearing it of plant debris, then you should dig again until the soil becomes loose and airy. |
| Fertilizer | It is necessary to fertilize the soil for planting shallots in the fall, even if you intend to plant this onion only in the spring, because it must overwinter with these nutrients and be immediately ready for planting when the weather warms up. So, per one square meter of the territory at your disposal, you need to dig the following fertilizers: In addition, you can mix a few handfuls of ash into the ground. |
| Formation of beds | For future convenience, you can immediately create beds during preparation, maintaining a distance of 25 centimeters between them. Having outlined the territory, in the spring you can easily figure out where to plant. |
| Final preparation in the spring | The final preparatory procedures associated with cultivating the land are carried out in the spring and include: |

Not only is it necessary to carefully prepare the land for planting, it is also very important to take care of preparing the seeds for planting. Here's how it's done.
1. Shallot seeds collected or purchased in a store must be wrapped in gauze or a cloth, and then placed inside a container with clean water.
2. After placing the seeds inside, the top of the container is closed with a lid, and the seed is kept in water at a temperature of 20-25°C for about 48 hours.
3. During the luring procedure, shallot seeds must:
- remove every 7 hours;
- each time place in fresh water and throw out the old.
4. After the specified soaking period has passed and the time has come for planting this plant, you will need to dry the onions in the fresh air.
Having prepared the seeds and leveled the beds, you need to:
- pour the seed into the grooves previously drawn with a rake;
- cover the seeds with dry soil.

After the onions sprout, it will be good to mulch the beds where they grow, using the following procedure to carry out this procedure:
- peat;
- humus;
- other organics.
Thirty days from the moment you plant the plant, you will be able to feast on the green feathers of the plant.
In the first growing season after sowing, shallot seeds form one bulb, consisting of 4 segments, almost cloves of garlic. After drying the collected fruits, these 4 segments will disintegrate and you will get several smaller bulbs.
These onions are sets suitable for planting next year. Already from the seeds you can get the following harvest:
- much more abundant;
- large.
It is necessary to use the seedlings within 4, preferably even 3 years, since its yield is lost by about 15% every year.
Planting shallots before winter
Shallots are one of the few crops that actually show resistance to changes in air temperature, however, not so strong as to classify it as a winter plant variety.

Therefore, planting this crop before winter is suitable only for those of our readers who live in the south, because:
- in mid-latitudes, the probability of obtaining a harvest of this crop after autumn planting drops to 55%;
- in the northern regions it drops to about 25%.
However, it is even wise to sow the vegetable in the fall in the south, since the green feathers appear much earlier than if you planted onions in the spring. It is advisable to carry out the planting procedure no later than October, so that the onions:
- managed to gain a foothold at the landing site;
- did not begin to germinate, since frost would otherwise kill it.
As with spring planting, the area of land must be carefully prepared. However, this time there is no need to soak the seeds, so as not to awaken them prematurely by saturating them with moisture.
Caring for shallots after planting
Caring for the variety of onions we are interested in involves the simplest procedures. Let's consider them further.
Watering
Shallots should be watered approximately every 2-3 days from the moment they are planted in the ground, and this should be done throughout the growing season, until only 25-30 days remain until the final harvest. Then watering must be stopped in order to:
- the feathers of the plant began to dry out;
- the bulbs have strengthened and become suitable for storage.
Follow the important rule related to watering moderation. You should not overwater the onion or suffer it from lack of moisture, there should be enough of everything.

Loosening
Frequent loosening of the soil is another important rule to keep in mind when planting shallots. During loosening, it is also necessary to remove weeds from the beds, which can easily crush onion crops with their force.

Fertilizer
After you see that the hatch has hatched from the ground, you will need to feed the beds using:
- nitrogenous fertilizers;
- humus;
- urea
In addition, at the stage when the bulbs begin to form, it will also be necessary to dig into the ground:
- potash fertilizers;
- chicken droppings;
- ash.
This will help you not only enhance the growth of your crop, but also improve its taste.

Onion thinning
If you want to get the largest onion harvest possible, you need to carry out a thinning procedure. So, around July, you should carefully remove small onions from the beds, thereby freeing up space for larger ones.
Treatment against pests and diseases
This type of vegetable from the onion family is rarely exposed to various ailments, however, it can get sick if it has been cool and damp outside for a long time.
Provided that a fungus has begun to grow on the onion, you must:
- remove infected seedlings from the beds and throw them away;
- spray healthy plants with industrial antifungal agents.
If your plant has been attacked by garden worms, it would be wise to spray it with a concentrated solution of salt and water.

In addition, another pest, the onion fly, really does not like wood ash, and you will quickly drive it away by simply spilling the mass from the stove into the onion beds.
Varieties of shallots suitable for growing in Russian gardens
Let's look at the three most popular varieties of shallots used in Russia, and start with the one that appears in the title of our article
Variety No. 1 – “Delicacy”
This varietal variety is a record holder for ripening speed. Already about 25 days after planting the seeds in the ground, the bulbs are ready to give you a juicy green feather.
In the second year of planting, already using sets, “Delicacy” forms pinkish-brown bulbs, very large. Thus, the weight of one head can reach 500 grams, respectively, each segment will weigh approximately 130 grams.

Variety "Delicacy"
Variety No. 2 – “Vitamin”
Another early ripening variety, it produces feathers 25-30 days after planting from seeds. One family can even form 10 onions, the weight of each of which will reach approximately 30-35 grams. The color of the scales is golden, the taste is rich.

Variety "Vitamin"
Variety No. 3 – “Family”
One onion family of this variety can be formed by approximately 2-4 onions, each of which will weigh approximately 25 grams. The color of the membranes and scales of the onion will be purple, while the flesh is traditionally white. This variety of onion is almost nothing more, for which it is used with pleasure throughout Russia.

Variety "Family"
Let's sum it up
Shallots are an unusual vegetable that is not known to all domestic gardeners, but in vain, because its taste, as well as ease of cultivation, as well as unpretentiousness, are at their best. Try planting shallots, and you will not be left without a harvest, and you will be able to enjoy the resulting fruits until next spring.
Video - Shallots
Shallots are a type of onion. It has a large number of similar features, but also contains its own distinctive features. To properly plant shallots, you should familiarize yourself with its most popular varieties, as well as the timing, rules for caring for and growing heirloom onions.
What is a shallot: its description, how it differs from other varieties of onions
In most respects, shallots are practically no different from onions. The most important difference is that shallots have increased branching of feathers, an increased number of bulbs that form in the nest and their smaller sizes. In addition, small splinters are better preserved than ordinary splinters.

By the way! Shallots are also called the family onion!
Shallots are a type of multi-nest onion. Its base can contain from 3 to 20 identical splinters. The more onions in the basket, the less weight they have. So, each head can weigh from 15 to 40 grams. Each head, compared to other varieties, has an elongated droplet-shaped shape.

Attention! A distinctive feature of shallots is that their greens have a finer structure, they are rounded, and are also distinguished by a rich green tint and a waxy sheen. Each feather reaches from 20 to 45 cm in length. When growing greenery, any bulb contains from 8 to 10 leaves.
When grown, onions and shallots show some differences. For example, small bulbs of heirloom onions germinate better in fertile, old-arable lands. At the same time, they should be somewhat heavier than for planting onions.
In addition, shallots are an early ripening plant; when planted in temperate latitudes, they ripen within 65-80 days. Unlike family onions, onions have a long growing process. To cut a plant into greens, only 25-35 days pass from the moment of planting.
The inner flesh of shallots has a predominantly delicate structure; the taste is not bitter, but has sweet notes. Therefore, the plant is in most cases used to prepare fresh salads, as well as other delicious dishes. First of all, the plant should be grown due to the increased quality of its greenery.
Shallots are well preserved over a long period of time.
Video: secrets and features of shallots
Popular varieties of shallots
Shallots have their own varieties. There are a large number of them, and they differ into special groups: early ripening, mid-ripening and late ripening. Gardeners generalize shallots into 2 groups:
- Ancient– there are varieties that have different ripening periods. They can be late harvest or early. This onion is distinguished by the varied shades of the upper husk. It often comes in brown, red, yellow or purple hues. Such plants include Snowball, Miner, Albik, Seryozhka, Star.
- Bushes- an early ripening variety with many rudiments. This type includes species with small and fairly densely spaced heads. The tone of the husk is predominantly yellow or pale yellow: Emerald, Guarantor, Airat, Guran, Banana.
Family onions are subdivided according to spiciness into semi-sweet, spicy and tender-sweet types.
Experienced gardeners identify the most popular among the many different types of shallots. according to ripening dates:
- early ripening– Belozerets, Vitamin, Emerald, Cascade, Family;
- mid-season– Andreika, Albik, Airat, Bonilla, Kubansky;
- late varieties– Ural violet, Siberian amber, Vonsky, Krepysh, Bargalinsky.
How to plant shallots: rules and instructions
Shallots are grown in two stages - in the first year the plant produces only 4-5 small onions, but in the second year the number of heads in the nest can reach 10 or more. The main thing is to choose the right time for planting and soil. In addition, it is recommended to know what was planted in the selected area in previous years. The location chosen determines how quickly the plant will grow and how much growth it will produce.

The technology for growing shallots is practically indistinguishable from rooting onions, but in some nuances it has its own characteristics.
Important! Luchins have a rather capricious character. The heads are sensitive to daylight hours, as well as to watering and placement. To obtain a high-quality shallot harvest, it is important to follow all recommendations for planting the plant.
When to plant heirloom onions in open ground
Shallots can be planted both in spring and autumn, but planting onions before winter gives earlier greens, and harvesting occurs 2 weeks earlier.
In spring, shallots can be planted as early as early April, because Onions are not afraid of frost.
In autumn, it is recommended to sow heirloom onions in the middle or end of October. The optimal timing for sowing shallots in the fall before winter is determined by the fact that from the moment of planting until the onset of a period of persistent frost, about a month must pass so that it has time to take root, but preferably not begin to grow.
According to the lunar calendar in 2019
A calendar, which includes the dates of the location of the Moon in one phase or another, is a kind of cheat sheet for the gardener, since scientists have long proven the relationship between the growth and development of plants depending on the movement of the celestial body.
According to the lunar calendar for 2019, favorable days for planting shallots are:
- in March – 10-12, 15-17, 23-25, 27-30;
- in April – 2-9, 11-15, 24-27, 29, 30;
- in May - 1-4, 12-14, 21-23;
- in June - 9-11, 18-20;
- in July - 25-31;
- in August - there are no recommended favorable dates;
- in September - 17-19, 26, 27, 30;
- in October - 4-7, 15-17, 19-21, 23-25, 27;
- in November - 1-3.
It is not always possible to plant shallots during a favorable period, but there are days, according to the lunar calendar, when it is completely undesirable to do this:
- in March - 6, 7, 21;
- in April - 5, 19;
- in May - 5, 19;
- in June - 3, 4, 17;
- in July - 2, 3, 17;
- in August - 15, 16, 30, 31;
- in September - 14, 15, 28, 29;
- in October - 14, 28;
- in November - 12, 13, 26, 27.
According to the lunar calendar from the magazine “1000 tips for a summer resident.”
Choosing a landing site
To get a high-quality harvest, it is recommended to first select the optimal place to place the onion. Shallots love to grow in open, sunny areas of the earth. Soil with a non-acidic pH environment is suitable for planting. Shallots need fertile soil with a neutral reaction. The soil needs to be light, loose and rich in nutrients.

Carefully! Acidic soil is not suitable for growing heirloom onions. In such a situation, the feather quickly acquires a yellow tint, and the splinter is crushed and loses all its taste.
After which it is better to plant

Shallots grow best after planting legumes, zucchini, cucumbers, cabbage or tomatoes in the area. This is due to the fact that these plants saturate the soil with nutrients and oxygen.
Carefully! You should not plant heirloom onions in areas where sunflowers, carrots, corn, beets or garlic have existed for a long period. After these crops, the soil remains depleted with nutrients completely sucked out. After such placement, it is recommended to pre-enrich the soil with cow manure and minerals.

You can grow onion sets either from bulbs or from seeds.
Growing from bulbs

Row spacing depends on the size of the planting material: 20-30 cm for large bulbs, 15-18 cm for medium-sized ones; 8-10 cm – for very small ones. It is not worth planting onions more often, because... The size of the future harvest depends on the feeding area. Before planting the bulbs in the beds, furrows about 5-6 cm deep are made, which are well shed, but are not compacted. The planting depth is about 6 cm, while the neck of the bulb should be 2-3 cm in the ground. A noticeable difference between autumn and spring planting of family onions is that before winter the bulbs are planted a little deeper.

To obtain bulbs It is better to use smaller planting material and plant shallots in early spring. And here to get a feather Larger bulbs should be planted in autumn (October).
Growing from seeds
It is recommended to germinate the seedlings before planting. The seeds are pre-soaked in warm liquid, wrapped in cotton cloth or gauze. It is recommended to cover the container with the seeds placed in it so that the moisture does not evaporate. The seedlings are kept in this state for 24, or preferably 48, hours.
Before planting, heirloom onion seeds are first dried and only then scattered into the beds. 
The selected area is cleared of debris and grass. After this, they dig well and add last year’s rotted compost from fallen leaves or cow manure. Having dug up, they begin to form furrows (exactly the same as when planting from bulbs). The sown seeds are sprinkled lightly with soil (1 cm). If the layer is too thick, the sprouts will not be able to break through.
Note! As a rule, shallots are planted bulbs due to low germination of seed material.
Video: shallots - agricultural cultivation techniques
Features of spring and autumn planting (before winter)
If shallots are planted in open ground in the spring, then it is more advisable to do it in April or early May. At this time, the plant has time to saturate itself with a large volume of melt water. At the same time, the torch is not afraid of residual frosts; on the contrary, it grows stronger and gains protective forces.
Attention! When rooting in spring, the growth of rays and feathers occurs during the longest daylight hours.
You can also plant family onions in open ground in the fall. In this case, the procedure is carried out in October. Weather conditions should be adjusted to encourage the onion to take root, but not to promote its growth. This means that planting should be done 30 days before the first sub-zero temperatures appear. Rooting for the plant is necessary because the head in this form will overwinter better than when the onion has rhizomes. Luchins can withstand a strong decrease in temperature - down to -20 C. But very often in the central zone, the Urals and Siberia, during pre-winter sowing, almost half of the plantings freeze out, although they undergo natural stratification and increase their own susceptibility to diseases and pests. Therefore, it is better to plant shallots in the fall before winter in southern regions.
How to properly care
In order for the plant to grow strong, healthy, and most importantly, with excellent external and taste qualities, it is recommended to take good care of the shallot bulbs. To do this, it is worth watering, loosening and weeding, as well as promptly applying fertilizers to the family onions.
Watering, loosening and weeding
Watering the shallot plantings during the first time after sowing should be carried out frequently, in sufficiently large volumes. When harvesting is scheduled, 21-28 days before it begins, it would be correct to slowly reduce the application of nutrient moisture. This is necessary so that the feathers have time to acquire a yellow tone and dry completely. 
It is necessary to periodically loosen and weed between the bulbs so that the plant receives a sufficient amount of oxygen necessary for development. Such an event is also necessary to ensure that a dense crust does not form on the surface, which does not allow moisture to flow evenly to the plants. Periodic loosening should also be carried out in order to eliminate fast-growing weeds that clog useful plantings.

Fertilizer application
During one growing season, shallots are usually fed 2 times.

First Fertilizers are applied in the spring, when the first 3 feathers appear on the plant. In this case, shallots are used as a top dressing carbamide or urea, diluting 1 tbsp. for 1 bucket of water. To this consistency it is recommended to add an additional 1/2 tbsp. l. potash fertilizer. 
Second Fertilizing for family onions is carried out when the 5th feather appears. During this period, the plant vitally needs phosphorus and potassium. For this purpose they use monopotassium phosphate in a volume of 1 tsp. for 1 bucket of water.
Diseases and pests of shallots
Shallots can be affected by fungal diseases such as powdery mildew, peronosporosis or downy mildew, cervical rot And fusarium wilt.
Of the pests, shallots are often attacked onion fly. You can also find on the onion worms.
Shallots can cause great harm onion nematode, which bends the bottom of the mother's bulb.
I still love green shallot feathers garden aphid.
When to harvest and how to store
Mid-July is mainly marked by an important event in the life cycle of the splinter - the cutting of the feather. The main thing is not to waste this time, otherwise, when harvesting shallots, you can provoke the growth of splinters and the development of green feathers in them.
Note! You can start harvesting shallots immediately after more than half of its feathers have fallen. It is the lodging of onion leaves that is the main sign of its complete ripening, indicating the death of the roots at the bottom.

Heirloom onions are harvested using the same methods as regular onions. It is dug up with a shovel, shaken and allowed to dry in the sun for 24 hours. Only after complete drying is it worth breaking the nests into separate splinters (or you don’t have to break them).
To send the bulbs for storage, they need trim dry leaves, leaving only a thin neck 3-5 cm high.

Shallots are perfectly stored at a dry, slightly cool temperature; at this temperature, the bulbs retain all their qualities for 6-12 months.
You can store heirloom onions in refrigerator (cleaned), because When frozen, shallots also retain their properties.
Thus, planting shallots in open ground in spring and autumn is almost completely the same as onions. The main thing is that in order to obtain a high-quality harvest, you should adhere to the basic rules for growing and caring for heirloom onions.
Video: shallots - full cycle from planting to storage
In contact with
Fast-ripening, juicy, sweet onions have many popular names - Ashkelon, Family, Shalotka, Semeyka, Sorokozubka, Gnezdovka, Kvochka, Kushchevka. Widely distributed in the south and central Russia; due to its frost resistance and rapid ripening, it is grown in the northern regions. Cultivating and storing shallots does not require much effort, but it does have some peculiarities. If they are followed, a good harvest of greens and bulbs is obtained.
Description of the culture and beneficial properties
Shallots are a perennial crop of the Onion genus of the Amaryllis family. In households it is often cultivated as a biennial plant. The first year produces only 5-7 bulbs, in the second - up to 15. The bulbs are small, 15-60 g in size, growing from one bottom in a nest. This feature of the Magpie onion is similar to garlic; it is also called potato onion (it grows as a bush and multiplies).
It looks like onion, but smaller in size and with some differences. The bulbs are golden, purple, brown, reddish in color. Shape: pointed towards the base, oblong, oval, elongated. When cut, they have a white, pinkish, greenish or lilac hue, the scales are thin, covered with dry films. The greenery is delicate, feathers 20-40 cm long with a waxy coating.
Family onions are rich in vitamins (A, C, group B) and minerals (selenium, chromium, zinc, calcium, iron, manganese, fluorine, iodine) and have low calorie content. Due to this, it is used in dietary and therapeutic nutrition.
Helps normalize blood pressure, strengthens the walls of blood vessels, protects against blood clots. It has antibacterial properties, removes toxins and bad cholesterol. Improves the functioning of the gastrointestinal tract and the condition of the visual organs. It is used as a preventive and therapeutic agent against oncology.

What is the difference between shallots and onions?
The magpie is very similar to the onion one, but there are still a few differences. Shallot bulbs grow in a nest, with several heads extending from one bottom. The pulp is juicy, sweet, less spicy, and contains more vitamin C and minerals.
Kushchevka differs from onions when cut. Instead of rings, zones with rudiments are visible. There is no strong odor after eating fresh shallots. After heat treatment it becomes sweetish, if overcooked it becomes bitter. The head size is small.
Another difference between shallots is their frost resistance; they can withstand temperatures down to -15°C. It lasts longer than turnips, even at room temperature. It produces greens earlier and ripens, 20-30 days ahead of onions. Onion feathers are thinner, rounded, rich green in color with a waxy sheen, and do not become rough for a long time.
Varieties of heirloom onions
Shallots have many varieties, divided into:
- early – Izumrud, Kushchevka Kharkovskaya;
- mid-season - Albik, Veliky Ustyug, Kuban yellow;
- late – Siberian amber, White Queen.
With proper care, they all resist disease well and are stored for a long time.
| Ashkelon onion variety Emerald | Semi-sharp taste. The bulb is round in shape, weighing up to 23 g, brown with a pink tint. The pulp is juicy and white. There are 4 pieces in the slot. Keeping quality up to 10 months. |
| Kushchevka Kharkovskaya | Medium-acute, ripens in 2 months, low yield. Bulb weight 25 g, elongated shape. The husk is brownish-purple in color. The pulp is light purple in color and juicy. Long shelf life |
| Albik | The growing season is 62 days, weight up to 30 g. Nests in 3-8 pieces. The shape is epileptic, the husk is yellow, the flesh is greenish. Long shelf life, high yield, suitable for winter planting |
| Veliky Ustyug variety | Similar in shape to onion. The bulbs are brown-red in color, strong, and have a spicy taste. Weight 1 pc. – up to 80 g. Nests in 8-10 pieces, high yield |
| Kubansky | Ripens in about 3 months. The bulbs are round-flat, yellow-brown in color, weighing about 30 g. There can be only 3-4 pieces in a nest. The pulp is semi-sharp to taste, white or light green. The variety is drought resistant |
| Siberian amber | It is grown as a biennial crop. The bulbs are round-flat, yellow-bronze in color, weighing up to 30 g, semi-sharp taste. Grows in 6-7 pieces. |
| Family onion variety White Queen | Large root vegetables (up to 70 g), round-elongated, white-cream color. The pulp is sweet-sharp, juicy, white. Well stored and multiplied, used for medicinal purposes |

Reproduction methods
Shallots can be grown from seeds or small bulbs with a diameter of 1-3 cm, most often they are bred with sets. But when grown in this way for a long time, the crop may begin to get sick, produce less yield, and the family degenerates. Then it is recommended to grow seeds for 1 year and plant from nigella the next year. The inflorescences look like a loose umbrella on an arrow up to 1 m long.
To breed Kushchevka from seeds, they are sown in spring or autumn (before winter). In the first year, small bulbs will grow, they are then used as seed. This growing method may be needed every 3-4 years.
Some varieties of Family Onions can be grown from bulbs for up to 15 years in a row.
How to Grow Shallots
It cannot be planted in the same place for 3 years in a row. Good predecessors are legumes, tomatoes, cucumbers, cabbage. For growing shallots, a place exposed to sunlight with neutral, nutritious soil is suitable. The soil has a light, loose structure. Do not sow after sunflowers, beets, carrots, or garlic. Its proximity to onions is not recommended, because the crops are easily crossed. Do not plant legumes, broccoli, parsnips, turnips nearby - they oppress Kushchevka. Carrots, radishes, and cucumbers are good neighbors and repel onion midges.
Planting and caring for shallots in open ground are similar to onions. Planting can be done in spring or winter. When to plant in open ground depends on the region, the main condition is that the soil must warm up to 5°C. In the fall, it is important to catch the bulbs before frost to take root. Can be grown in greenhouses and greenhouses. Cultivation on high beds gives good results.
To plant Family Onions on turnips, use bulbs 3 cm in size. Larger planting material will produce more bulbs in the nest, but they will be small. Miniature bulbs are used to produce greens. These need to be planted in open ground before winter.

Soil preparation
Shallots are called Family because one bulb produces several new roots. They need a nutritious environment for development, so soil is of great importance. The family grows well in loose, fertile, neutral soils. In an acidic environment, the root crop will turn yellow and the onion harvest will be small, so it is necessary to prepare the soil before planting.
If you plan to plant in early spring, in the fall you need to dig up the soil to a depth of 25 cm. First sprinkle humus or compost, superphosphate, and potassium salt over the surface. You can also use ash or dolomite flour, urea. If the soil is clayey, add sand. Apply nitrogen fertilizer in the spring. To plant Kushchevka before winter, the soil should be prepared in summer.
Planting material
Most often, Heirloom onions are grown from small bulbs. Their size varies from 1 to 3 cm. Seed material is selected from healthy plants with good dense foliage and a large nest. The mass of the seed bulb is 8-18 g. Large ones, from 20 g, can be cut. Small heads will produce fewer bulblets in the new nest, but they will be larger.
Family onions need to be prepared for planting in the spring: place the bulbs in water at 40-42°C for 9-10 hours, keep them for 15 days at a temperature of 20-28°C. This is used to disinfect and prevent the formation of shoots after planting.
If it is not possible to carry out this procedure, first hold the seeds for 30 minutes. in a strong solution of potassium permanganate or fungicide. When growing shallot seed material, the nigella should be placed in a fabric bag and kept in warm water for 1.5 days, changing it periodically. Leave in a damp cloth for 2 days, or treat with potassium permanganate. Dry the seeds before planting.

Landing
Do not plant in soil that is too wet or dry. Leave 20-25 cm between rows, 10-15 cm between bulbs (depending on size). Family onions are planted 2 weeks before frost (for winter sowing) or in the spring, as soon as the soil warms up to 5°C. The lumps of earth should break easily upon impact.
Before planting Family in the spring:
- loosen the soil, form furrows, water;
- add wood ash as fertilizer;
- plant the seed material to a depth of 5-8 cm, on top there should be soil about 3 cm thick;
- deepen the seedlings to obtain a large harvest;
- After completing the work, lightly hill up the soil.
Moist, loamy soil is suitable for winter planting. It is necessary to make furrows 2 cm deep, with a distance of 10 cm between the seedlings. Compact the soil and cover it with peat, straw or compost. In winter, it is advisable to throw snow on top.
Features of care
After planting, you must follow the rules for growing and caring for shallots. Until seedlings appear 10 cm deep, you don’t need to do anything, not even water. If the seedlings dig their roots into the ground in search of water, it will only be better. Then you should mulch the soil with mowed grass, you can use weed grass. There is no need to pre-dry. This will retain moisture and protect against the appearance of new weeds. Watering regime: once a week, 20 liters of water per 1 m2, at least 3 times per season. It is better to water rarely, but abundantly. Stagnation of water is also undesirable.
Loosen the soil 1-2 times a week and remove weeds in a timely manner. To grow the Family Onion large, at the beginning of July you need to thin out the seedlings - carefully unscrew the bulbs from approximately the middle of the bush.

This will give neighbors more space and nutrients to develop. There is no need to water and fertilize, otherwise, instead of increasing mass, the onion will continue to strengthen the leaves. Remove the arrows until they grow 10 cm.
The first feeding is 2 weeks after most of the bulbs have germinated. Bird droppings and mullein are used in a ratio of 1:10, diluted with slurry 1:5. Fertilizer is applied in the ratio of 1 bucket per 1 m2. If you can’t fertilize with organic matter, you can fertilize with ammonium nitrate and superphosphate. The second feeding is needed during the formation of the bulbs; potassium chloride and superphosphate are used. From the beginning of July, stop all nitrogen-containing fertilizing and reduce watering.
Before growing shallots, you need to carefully dig up the soil and remove plant debris. This will reduce the possibility of pests and diseases. After planting, regularly loosen the soil, inspect the plantings for damaged plants, and take action if necessary.
Cold and damp weather can cause the development of fungal diseases (peronospora, powdery mildew, fusarium, neck rot). Remove the affected root vegetables, treat the rest with a solution of Pentofag or Mikosan - these are pesticides, you need to carefully study the instructions. How long will it take for onions to be eaten?
Onions can be affected by pests such as onion flies, nematodes, and aphids. Prevention of the appearance of flies - early planting, loosening, proximity to carrots, you can put tansy and wormwood in the aisles. To prevent pests, sprinkle the above-ground part of the plant and the soil with wood ash. To remove worms, treat the leaves with a salt solution (1 tbsp per 10 liters of water). You can use a decoction of pepper, chamomile or potato peelings against aphids.
Harvesting Family onions must be removed from the beds on time; delay can shorten the shelf life of the crop. When ¾ of the leaves have fallen, you need to start cleaning in sunny, dry weather.
Depending on the variety, this is the end of July - August. Shortly before work, watering should be stopped.
Store the bulbs in a cool, dry place at a temperature no higher than 1°C. Do not use polyethylene, air access is important. Can be stored in boxes, nets, stockings, fabric bags, baskets. In apartments it is better to store in braids or bundles at a temperature of no more than 19°C. Keep away from batteries.
Many gardeners love shallots for their mild, refined taste and pleasant aroma. He is incapable of bringing tears. For these qualities, the crop is even called an aristocrat among all types of onions. Gardeners often wonder how to grow shallots correctly, and what conditions are necessary for this.
The plant got its Latin name Allium ascalonicum L from one famous city in Palestine - Ascalon. The name was first mentioned in chronicles from 1261. Today the crop is successfully grown in many countries of the world - Greece, India, Egypt, many regions of Russia, Kazakhstan and Ukraine.
Shallots not only belong to the type of onion, but in their properties and characteristics they are not much different from them, except that they have smaller bulbs and can be stored longer without sprouting. Shallots are a multi-lobed onion; from one seed, from 3 to 20 bulbs can be born, each of which weighs from 15 g to 40 g. The green feathers with a waxy sheen are thinner and more rounded than those of other varieties of this crop. Shallot bulbs are small (up to 50 g) and slightly elongated. The taste is delicate, juicy, not bitter at all, one might even say sweet. It is used to prepare the most delicious dishes. Due to the high dry matter content, onions are suitable for drying, they can be caramelized and pickled.
Culture has a number of advantages and valuable qualities:
- Thanks to the short growing season, the bulbs ripen early. This also eliminates onion infection with downy mildew and neck rot;
- feathers have the ability to quickly lie down, and this has a beneficial effect on the ripening of the bulbs and facilitates the harvesting process;
- Shallots are stored well and for a long time, almost all year round, do not shoot arrows and do not rot;
- forcing onions is easy, without any problems;
- Thanks to the large number of bulbs from one nest, the onion harvest is always excellent. Each nest can produce from 4 to 10, and sometimes up to 20 bulbs with a total weight of 150 to 300 g.
You can see what shallots look like in the photo.


Onion varieties
Like other types of onions, shallots can be early-ripening, mid-ripening and late-ripening. Gardeners often divide it into 2 general groups:
- bushes are a multi-primed and early-ripening species. It includes varieties with small and dense bulbs with dry scales of light yellow and yellow color. The seed productivity of the variety is low, but it has a long shelf life;
- ancient - the maturation period of the species can be either early or late. This type of onion has large bulbs with yellow, purple, red and brown husks.
In addition, the plant is divided into semi-sharp, spicy and sweet varieties. There are many varieties of this crop, but among them there are the most popular and in demand:
- Early ripening varieties:
- Belozerets – the growing season lasts from 76 to 85 days. It has oval bulbs weighing up to 30 g. The taste is pungent, but not bitter. Grows better in the Caucasus;
- vitamin - green feathers are ready for harvesting 20 days after the first shoots. The growing season lasts 70 days. Up to 10 bulbs weighing 30 g ripen in each nest.
- Mid-season varieties:
- airat - suitable for growing in garden plots. From one nest you can get up to 6 round bulbs weighing 15 g, and from 1 sq. m harvest up to 1.6 kg;
- albik – has elongated bulbs weighing up to 30 g each; up to 8 pieces can be collected from a nest. Albik produces a high yield - up to 25 tons per hectare. It stores well, the growing season lasts 62 days. Can be planted before winter;
- andreika - suitable for growing in garden plots. The bulb is elongated, weights up to 26 g, can be harvested up to 1.8 kg per kW. m.
- Late ripening varieties:
- Ural purple - recommended for growing onions. It is represented by quite large bulbs up to 60 g. It has a high yield - 165 c/ha. Grows well in most onion growing areas;
- Siberian amber – the growing season lasts up to 60 days. The bulbs are round, slightly flattened, weighing up to 30 g. The variety is suitable for growing in garden plots, yields up to 23 t/ha, recommended for cultivation in most onion growing regions.

Growing onions
Shallots rarely produce arrows, so growing them from seeds is preferred by specialists. But this does not mean that gardeners cannot do this on their plots if they wish. It is very difficult to collect seeds yourself, but they can be purchased in specialized stores. And if you still decide to get shallot seeds yourself, follow these steps:
- It is necessary to select the highest quality bulbs, which have a shelf life of at least 4 months at a temperature of +4 to +12 °C.
- The bulbs are planted in open ground in early May. After such vernalization, they will quickly shoot arrows with flowers from which seeds can be collected.
- An important condition for this process is not to plant shallot bulbs near onions of other species, so that cross-pollination does not occur.
Selection of location and soil
Shallots, the cultivation of which has its own characteristics, are bred both for the green feathers and for the sake of the bulbs themselves. To reap a good harvest of onions, you need to choose the right place for planting and carefully prepare the soil:
- This culture loves open sunny areas, unshaded by shrubs and trees. When choosing a landing site, be sure to take this into account.
- Particular attention should be paid to the soil. Shallots love loose and non-acidic fertile soils. Acidic soils are absolutely not suitable for growing shallots. Onion leaves quickly turn yellow, and the bulbs eventually become smaller and dry out. In areas where groundwater is close to the surface of the earth, shallots are properly grown with good drainage.
- It is important to know which predecessors grew in the areas planned for shallots. It is recommended to plant shallots after all types of cabbage, legumes, potatoes, zucchini, pumpkins, tomatoes and cucumbers. It is not advisable to plant onions where sunflowers, corn, garlic, beets and carrots grew. It is better to choose all types of salads, carrots, cucumbers, radishes, strawberries as neighbors to shallots. They all benefit each other. For example, carrots are able to repel the onion fly with their smell, for which the shallot thanks the carrots in the same way - it does not allow the carrot fly to infect the vegetable. But legumes, greens, parsnips, broccoli, spinach, and turnips growing nearby can depress the culture. It is especially undesirable to plant shallots near onions, since they can interbreed, thereby losing their individual qualities.
- Before planting, the soil must be dug up and well fertilized with organic matter and minerals.
- It is not recommended to grow shallots from seeds in the same place for more than 3 years.

Growing shallots for green feathers
Shallots are perfect for growing green feathers due to their rapid ripening time. The greens are not prone to shooting arrows and remain tender and soft for a long time. Leeks can't even match the profitability of shallots, and they require less seed.
To collect as much green feather harvest as possible, you need to know the following:
- You can grow shallots for pens in open ground, as well as in greenhouses, hotbeds and even on loggias and window sills in pots.
- If you plant the crop at home, then this should be done at the end of February. You will be able to collect the first harvest in a month.
- Once cut, the bulb can be reused. It needs to be removed from the ground, cut off in half and lowered back into the ground. In another month you will receive a second harvest of juicy, healthy greens.
- Onions are planted in open ground at the end of April, and if before winter, then at the end of October. Shallots easily tolerate frost and cold. The first harvest of shallots is also harvested a month later, when the height of the feathers reaches 20-25 cm. This is especially valuable in early spring, when the body lacks vitamins.

Spring planting of shallots
Spring planting of shallots is possible both on green feathers and on turnips. The whole process consists of the following steps:
- The crop is sown at the end of April or at the beginning of May, but the soil for planting needs to be prepared in the fall. To do this, the ground is cleared of weeds, dug up, then fertilized with organic matter and minerals - humus or compost is needed in an amount of 5 kg per 1 sq. m. m, and superphosphates 70 g per 1 sq. m. You can add a little ash. After fertilizing, you need to form beds at a distance of 20 cm from each other, which in the spring will be well loosened and additionally fertilized with nitrogen minerals in the amount of 25 g per 1 sq. m. m.
- Seeds must be prepared in advance for planting. To do this, they are placed in gauze or cotton cloth, which is wrapped in a bundle and dipped in a container of water. The container must be covered to prevent the seeds from drying out. In this form, the seeds are kept at a temperature of 22-25 °C for about two days. The seeds should be washed under running water every 6-8 hours, and then placed again in a container with clean water.
- Before planting, the seeds need to be dried a little in the open air so that they crumble, after which they are sown in beds prepared in the fall and covered with soil. It is advisable to sprinkle the beds with peat or rotted compost on top.
- The beds with crops need to be well watered.
- In 20-25 days, under favorable conditions and proper care, it will be possible to harvest the first harvest of greenery.
- In the first year, the seeds will produce an onion consisting of 5-6 small onions, into which after drying it will disintegrate. These bulbs are planted the next year to produce larger and more numerous bulbs, which in turn will be suitable for vegetative propagation for no more than 5 years. After this, the planting material is again updated to maintain grade.

Planting shallots before winter
Even despite the good resistance of shallots to severe frosts, it is recommended to plant them before winter in the southern regions. In mid-latitudes the yield will be no more than 50-60%. The plant is sown in the fall to obtain green feathers in early spring and the process begins in mid-October so that the seeds become stronger in the ground, but do not have time to sprout before the first frost:
- The area chosen for crops is cleared of dried grass.
- Compost from rotted leaves or manure is added to the dug up soil and beds are formed at a distance of at least 20 cm from each other.
- There is no need to prepare the seeds; they are simply sown in prepared beds and buried in soil.
- In winter, the sown area is covered with film to prevent the seeds from freezing.
Onion care
After planting, the crop requires certain self-care, which consists of the following steps:
- At first, the crops will need regular moisture throughout the growing season. Watering can be stopped 3-4 weeks before harvesting so that the feathers have time to dry out and wither.
- A prerequisite is regular weeding and loosening of the soil. Weeds grow quickly, overwhelming the onion seedlings.
- When the onion starts to sprout, it can be fertilized with nitrogen minerals, rotted manure or urea. Bulbs starting to form will need potash fertilizers, ash and chicken droppings.
- If you want to get a larger turnip, you will need to thin out the onion. In early July, you need to carefully remove the small bulbs right with the feathers, leaving 5-6 large bulbs in the nest. Removed feathers can be used for food.
- Onions are rarely affected by disease, but this can occur if cold, wet weather persists. In such cases, the affected onion is removed, and the remaining bushes are treated with antifungal drugs. When onions are damaged by white worms, they are treated with a solution of water and table salt in a ratio of 1:10. Onion flies can be repelled by spraying ash over the beds.
- Harvest can be done at the end of July. By this time, the bulbs will already be fully ripe.

Shallots, the cultivation and care of which will not be very burdensome, will give an excellent harvest, provided that all of the above recommendations are followed. You can watch the video on how to remove and store shallots.
 Copper resistivity Units of electrical conductivity
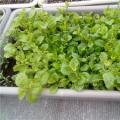 Foxglove photo, planting and care, types
 Growing and caring for almonds Decorative flowering almonds